
Webmin - the best replacement for XPanel
Webmin is a web interface for administering Unix systems. It simplifies system management, especially for those who are not familiar with the command line.
Why you need Webmin
Here are some main features and capabilities of Webmin:
- User and group management: creating, deleting and editing users and groups, as well as managing user permissions.
- Service and daemon management: starting, stopping, restarting and automatic startup of services when the system starts.
- Package management: installing, updating and removing packages using various package managers.
- Network management: configuration of network interfaces, DNS, DHCP, etc.
- System management: managing cron jobs, creating configuration backups, viewing system logs, etc.
- Security management: configuring firewall, managing SSL certificates, managing access to Webmin, etc.
- Server management: support for many popular servers such as Apache, Nginx, MySQL, PostgreSQL, BIND and others.
- Modularity: Webmin consists of modules that can be installed and removed as needed.
- IPv6 support: Webmin supports IPv6, however this feature may not work correctly under some conditions.
- Cloud service support: some Webmin modules support cloud services such as Amazon S3, but this feature may be limited or unavailable in some versions of Webmin.
Please note that some of these features may require additional modules or settings and may not be available in the basic Webmin installation.
Preparing the server
For this, we need to buy the necessary server in the desired location.
In our case, it will be the basic plan SWEs-1 in Sweden:
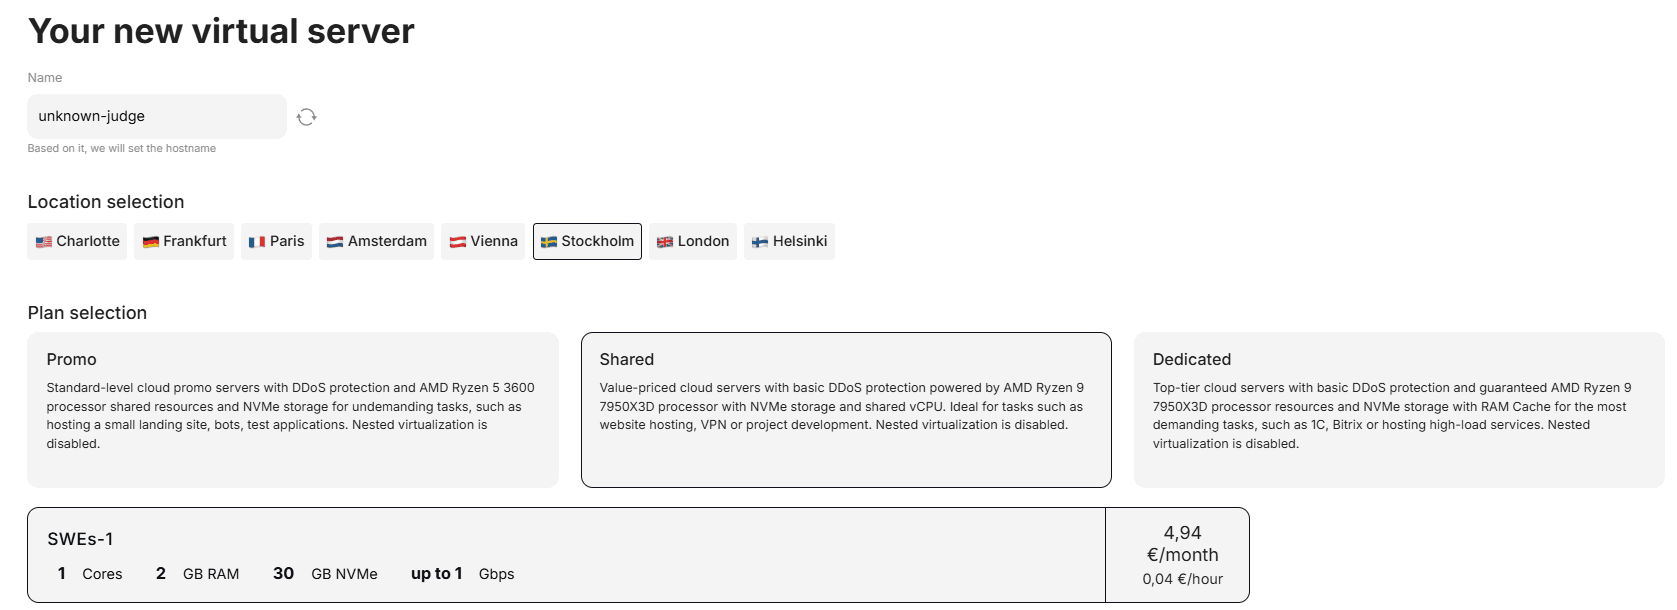
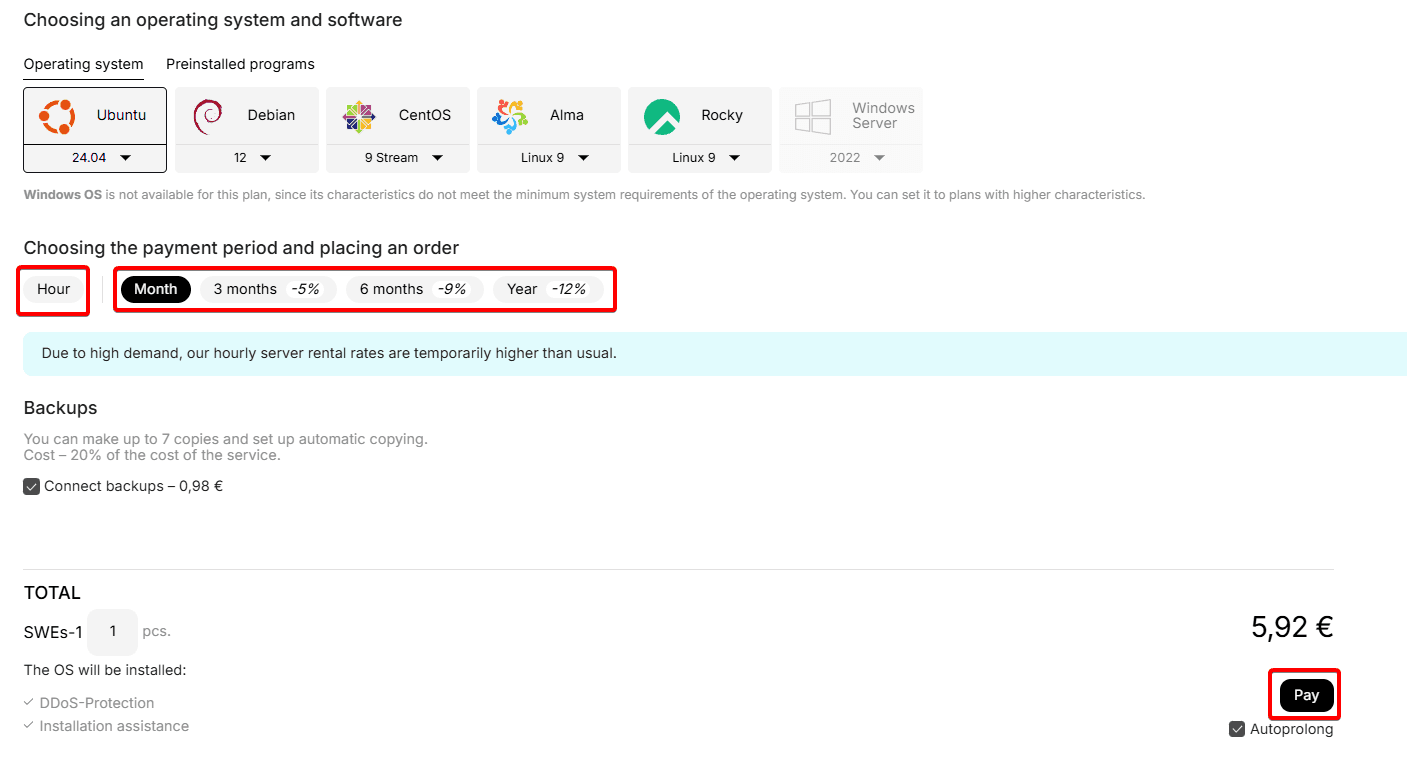
We choose the Ubuntu latest version - 22.04 operating system.
Set the desired rental period by hours or months and click the pay button:
Great. Now your server is ready to install Webmin.
Installing Webmin
Go to our server and start entering commands.
Update the system:
Open the terminal and enter the following command to update the package list:
sudo apt-get updateInstall dependencies:
Webmin requires the Perl package, which can be installed with the following command:
sudo apt-get install perl libnet-ssleay-perl openssl libauthen-pam-perl libpam-runtime libio-pty-perl apt-show-versions python3 apt-transport-httpsDownload the latest version of Webmin:
Visit the official Webmin website and find the link to the latest .deb file. Then use the wget command to download the file.
For example, if the latest version is 1.973:
wget http://prdownloads.sourceforge.net/webadmin/webmin_1.973_all.deb1. Install Webmin:
Use the following command to install the .deb file:
sudo dpkg -i webmin_1.973_all.deb2. If errors occur during installation due to unsatisfied dependencies, you can fix them by running the command:
sudo apt-get install -f3. Then you should see this message in the command line:
Webmin install complete. You can now login to https://nameserver:10000/
as root with your root password, or as any user who can use sudo
to run commands as root.
After this message, you should go to your browser and enter this line:
Your server IP:100004. After you go to the site via the link in step 6, you will see a data entry form - username and password:
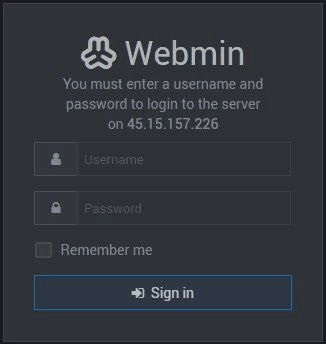
Username by default will be - root Password is your password, which you can find in the settings of your service on our website
In case you cannot access the site via the IP:10000 link, then enter the command:
sudo /etc/init.d/webmin start
After that, try logging in again via the link!
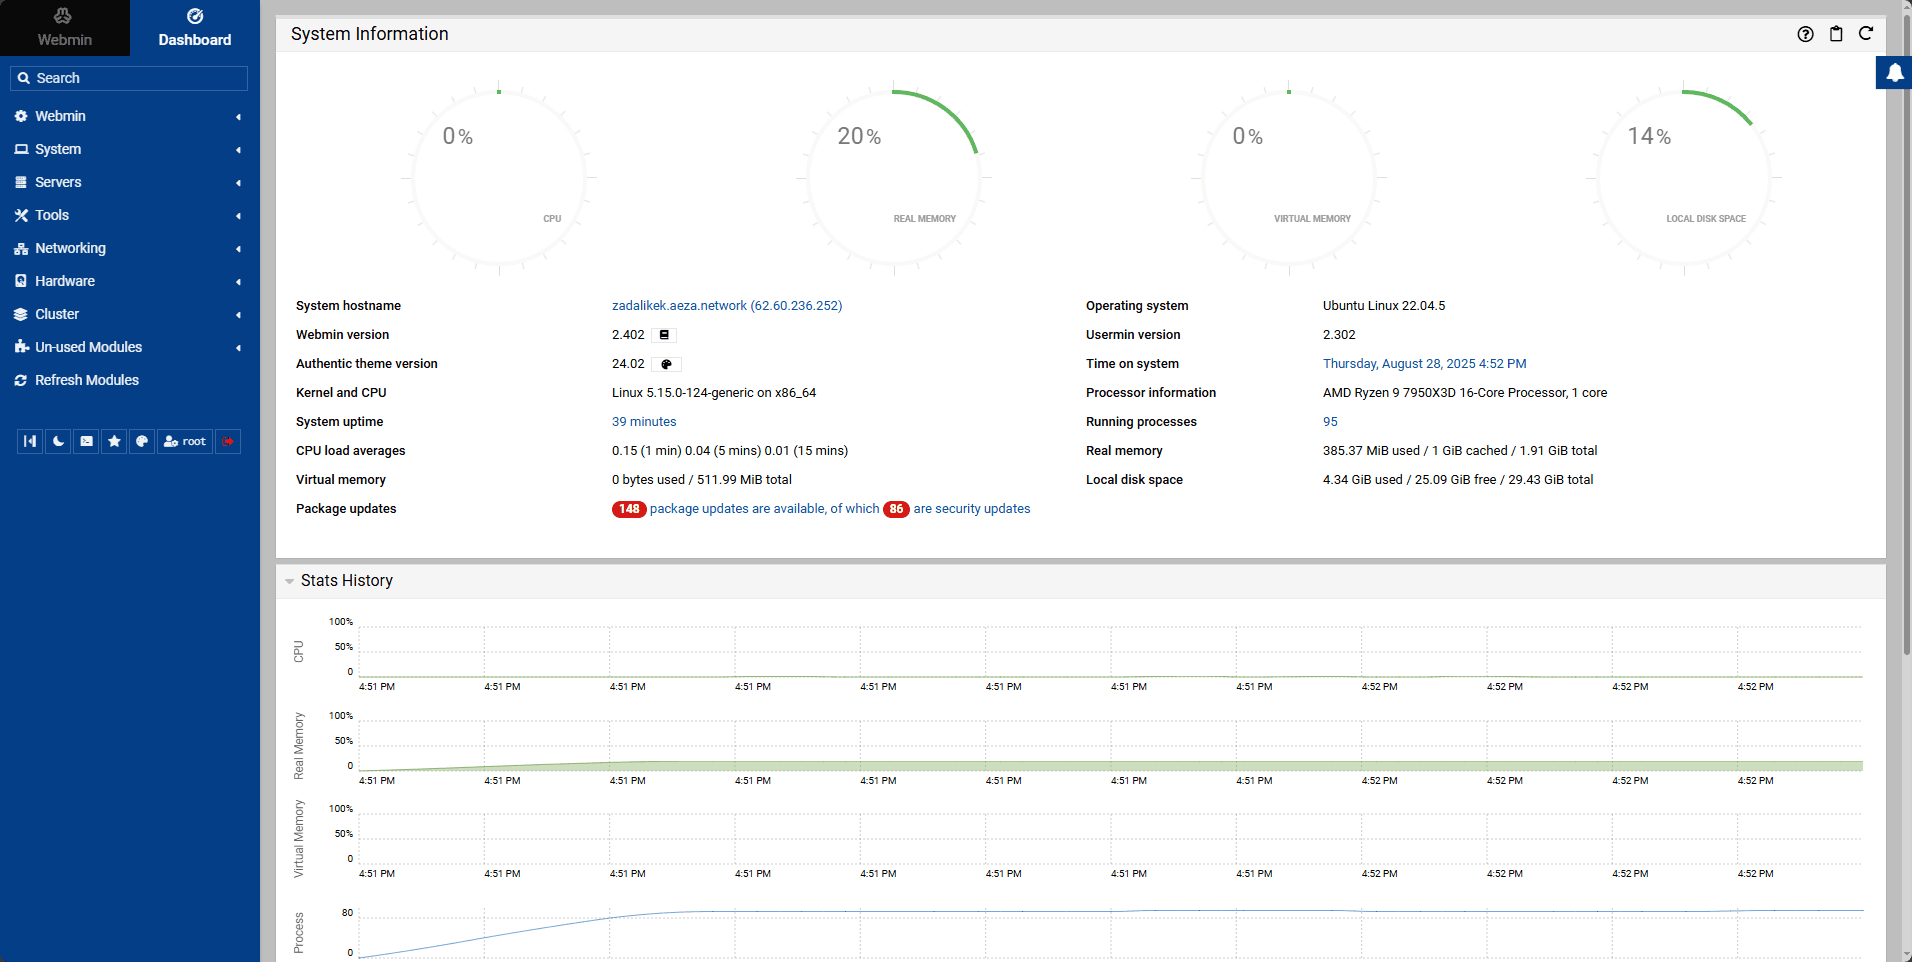
After entering the data you get to the main Webmin menu:
Congratulations! 🎉
SSL certificate on Webmin
To configure Webmin to work with an SSL certificate, first you will need to obtain an SSL certificate. You can generate a self-signed certificate or obtain it from a certificate authority (CA) such as Let's Encrypt.
Here are the general steps for configuring SSL on Webmin:
1. Obtaining an SSL certificate:
First, you will need to obtain an SSL certificate. If you want to use Let's Encrypt, you can use a tool such as Certbot or acme.sh to automatically obtain and update certificates.
Here's an example of how you can use acme.sh to obtain a certificate for your domain:
acme.sh --issue --standalone -d example.com --httpport 802. Configuring Webmin to use the SSL certificate:
After you have an SSL certificate, you can configure Webmin to use it. Here are the general steps:
- Log into your Webmin interface.
- Go to the "Webmin Configuration" section.
- Select "SSL Encryption".
- Click the "SSL Settings" button.
- Select "SSL Encryption".
- Click the "SSL Settings" button.
Fill in the "Private key file" and "Certificate file" fields with the appropriate paths to your certificate and private key files. If you used acme.sh, they will be in the ~/.acme.sh/example.com/ folder.
Click "Save" to save the changes.
Finally, restart Webmin to apply the new settings:
/etc/init.d/webmin restart