
Creating SSH keys and connection
SSH keys will allow you to protect servers through multi-factor login verification. We recommend installing!
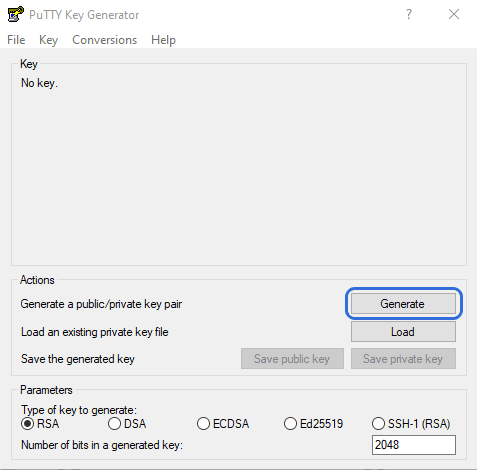
Creating a key in Windows
To do this, we will need the PuTTYgen application, which you can download from the following link: https://puttygen.com/download-putty
Click the "Generate" button and move the mouse to random parts of our screen (this will create a unique key).
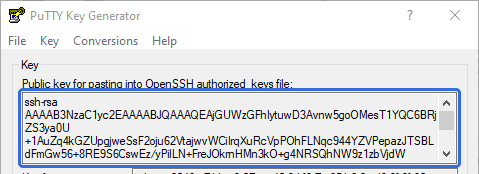
After generation, the generated key will appear in the upper "Public key" section, which you can also save with the button below.
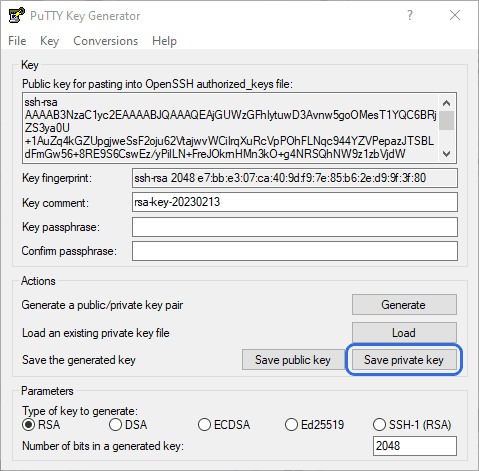
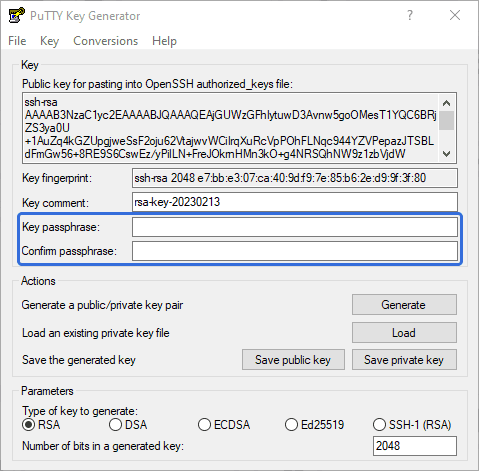
For greater security, you can specify a second "private" password twice by entering it in the "Key passphrase" line. It will be required every time you connect to the server. Save it in a convenient place as well.
Key file names can be anything.
After saving, we will get 2 separate files with each of them:

Methods for installing SSH keys on the server
Using nano (console text editor)
Connect to the server and enter the command to create the key file:
nano /root/.ssh/authorized_keys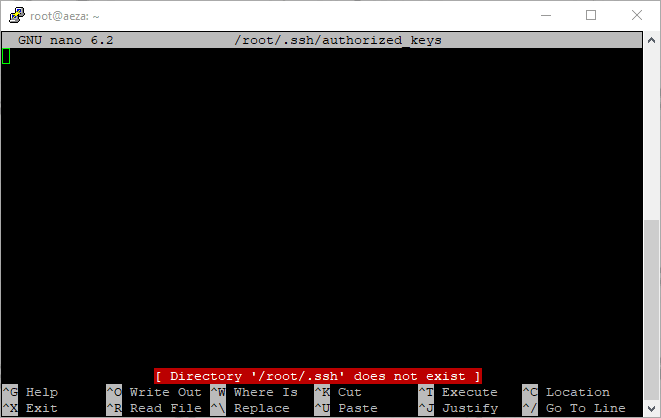
After it, an empty text file will open in front of us, into which we need to copy the previously created public key:

Insert our key by pressing RMB (right mouse button).
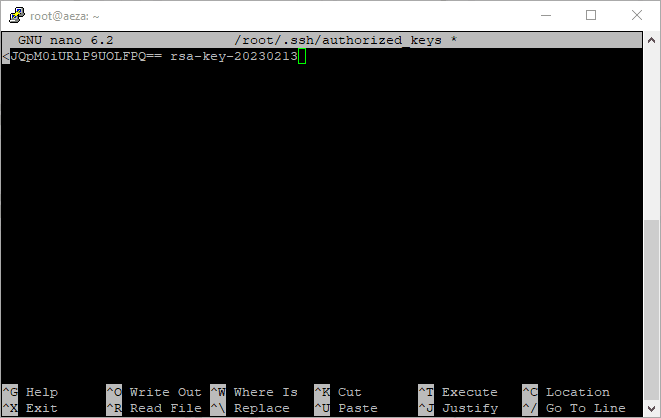
Press the key combination Ctrl + X and save the file (with the letter Y):

SSH key is installed on the server.
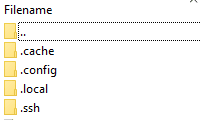
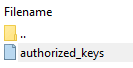
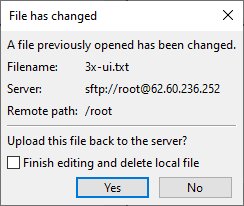
Using sFTP to transfer the public key file
Connect to the server and go to the .ssh directory.
Find the empty authorized_keys file and open it with RMB for editing.
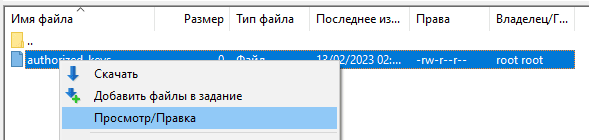
Insert the contents of our public key.
Save changes and send them to the server.
You have installed an SSH key on your server!
Connecting via SSH key
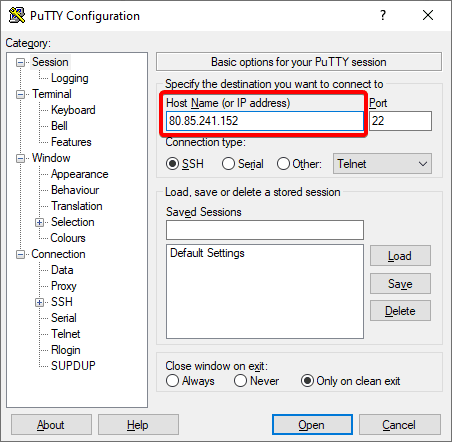
Open the PuTTY program for connecting to the server and specify the IP address of our server.
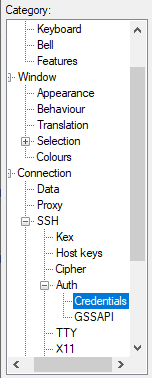
In the left menu, open the "SSH" tab and then "Authentication".
Specify the location of our private key with the .ppk extension. Click the "Connect" button.
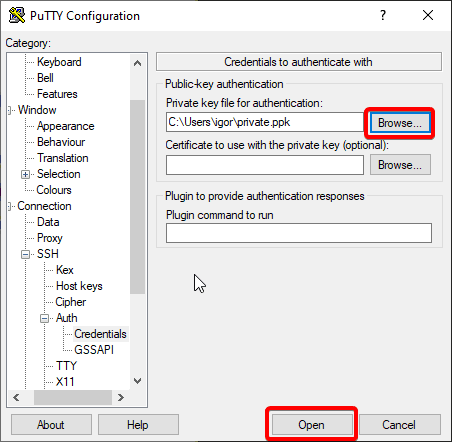
In the connection interface, specify the login.
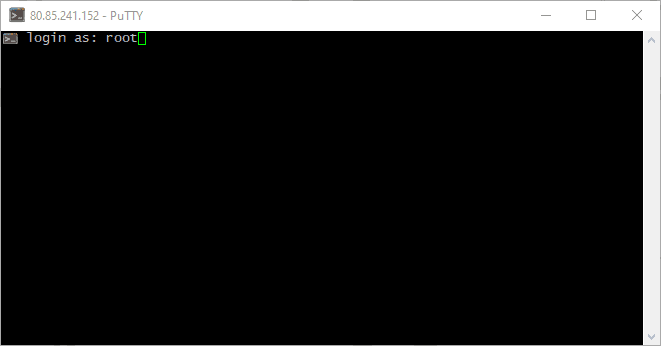
Specify your Passphrase code (which we assigned when generating the key), in our case "aeza".
You have logged in via SSH key!
Saving settings for quick login
To save time, you can save your connection data in PuTTY.
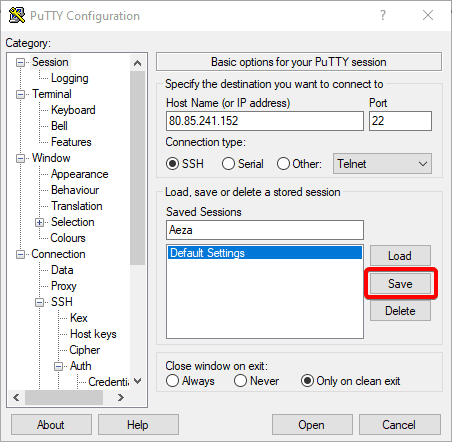
Specify the login, adding the server IP through "@" and bind the private key. Enter the name of the saved connection settings (session).
username@IP-address
![]()
Done! In the future, it will be enough for you to select the desired session and click "Load". Or double-click on the desired template.

If you have an installed private key, the server will ask you to enter it.
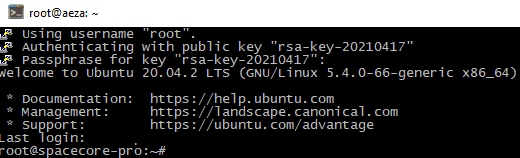
Now you can be confident in the security of your data!
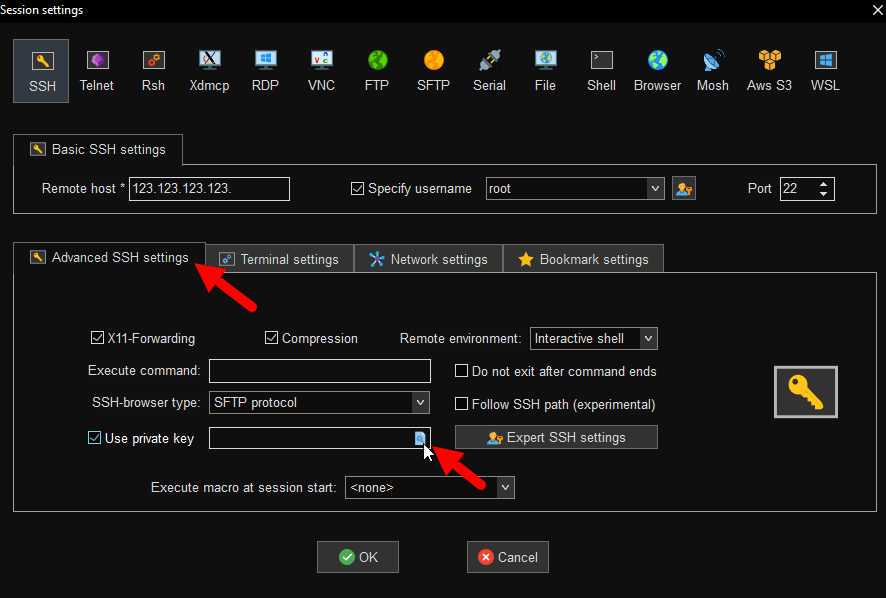
If you use MobaXterm for connection, you can specify the path to the created ssh key in the "Advanced SSH settings" section.
Setting up recommended VPN clients
This instruction will describe step-by-step setup of our recommended VPN clients
TorrServer - personal streaming service for movies and TV series
TorrServer is a free and open software package used for downloading and instant streaming viewing of movies and TV series from torrent files on home TV, phone or computer.