
Disabling password authentication
If you are already using SSH keys, then you should definitely disable the ability to connect to the server via password.
Do not disable password authentication before adding SSH keys. We told you how to add them in the previous article - click
Ways to disable password login
Using nano (text editor)
Enter the command to go to SSHd settings:
nano /etc/ssh/sshd_config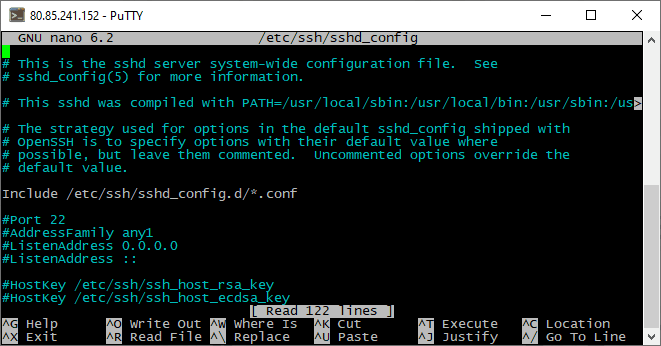
Move the cursor to the line #PasswordAuthentication yes.

Remove the hash symbol (#), making the line active. And change the value "yes" to "no".
![]()
Save the changes by pressing CTRL+X and entering the letter "Y" for confirmation.
![]()
Restart the SSH service:
sudo service ssh restartUsing sFTP
Connect to the server and specify the path /etc/ssh in the address line.
Open the sshd_config file.
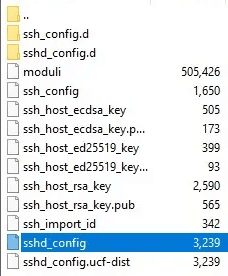
Find the line #PasswordAuthentication yes.

Remove the hash symbol (#) and make the line active by changing the value yes to no.

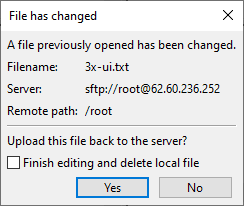
Save and confirm sending changes to the server.
Restart the SSH service:
sudo service ssh restartSetting up sFTP authentication via SSH key
After disabling access to the server via password, it will be important for you to enable sFTP authentication via SSH key. This will take no more than a minute.
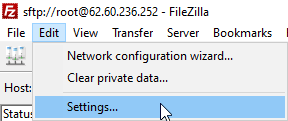
FileZilla
Open the "Edit" section and "Settings".
Go to the "FTP" subsection, then "sFTP" and add the private key file.
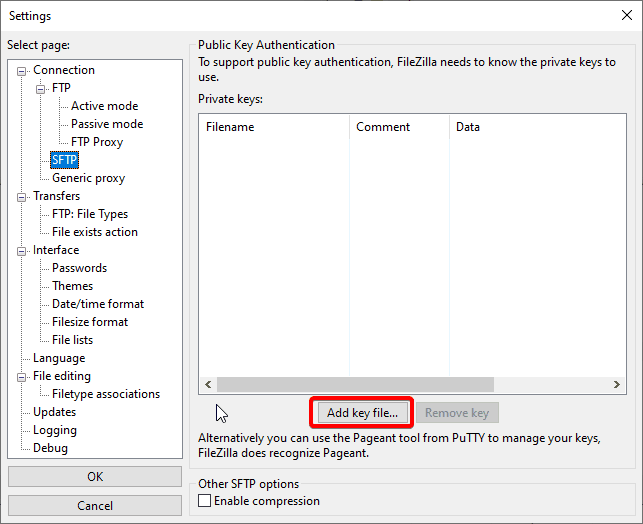

Now FileZilla will use this key when connecting to the server.
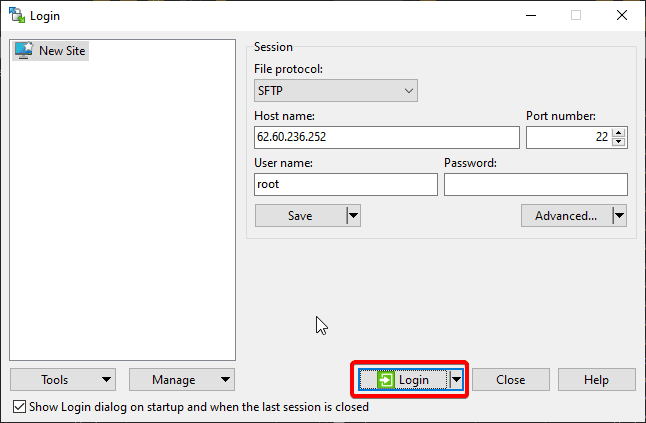
WinSCP
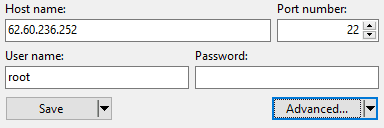
Create a new connection.

In the opened window, specify the server IP address and username.
Click the "More..." button under the password input line.
Select the "Authentication" section and add the private key.
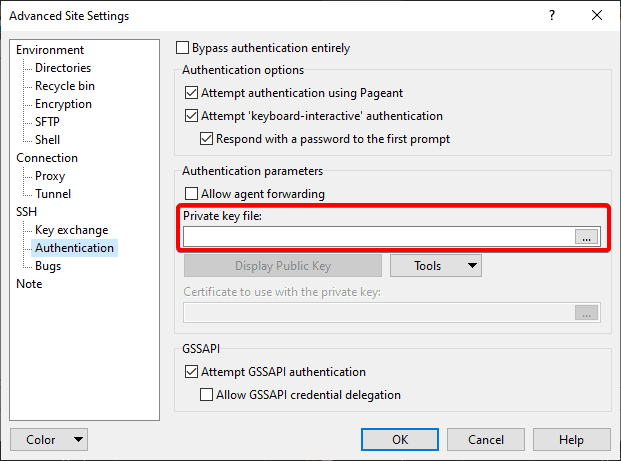
Save changes with the "OK" button.
![]()
Let's try to connect to our server.
Enter the secret key code (Passphrase), in our case "aeza".
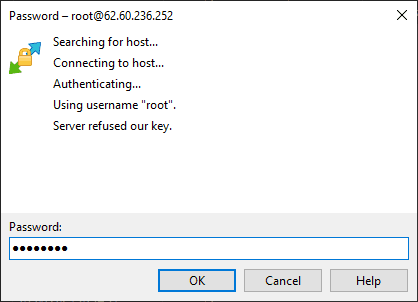
Congratulations! You have connected to the server via sFTP!

SSH and SFTP connection
Connection to servers based on Linux OS is carried out using SSH/sFTP protocols. Let's figure it out!
Downloading files on Windows Server
Surely many have encountered the problem that the standard installed Internet Explorer browser on Windows Server does not allow downloading the desired file, let's fix it!