
Installing corporate messenger Conduwuit
Conduwuit is a well-maintained hard fork of Conduit with many new features, many bug fixes, and performance improvements.
To deploy your own Conduwuit server, you must have your own domain name.
Creating a server for Conduwuit
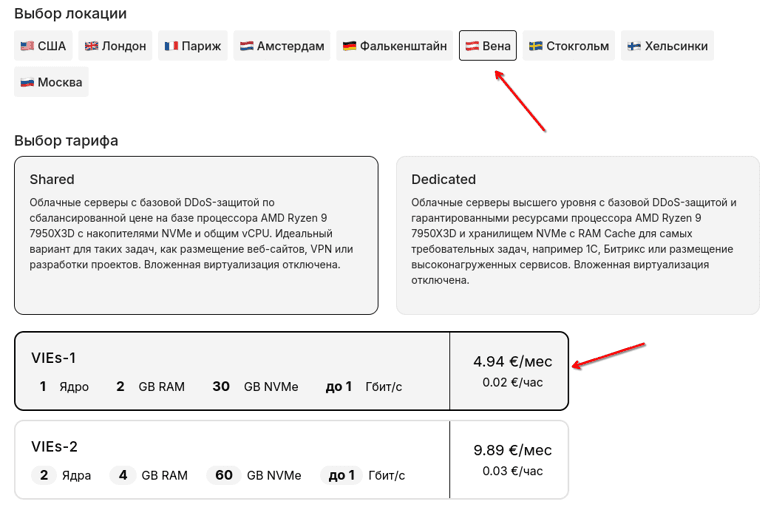
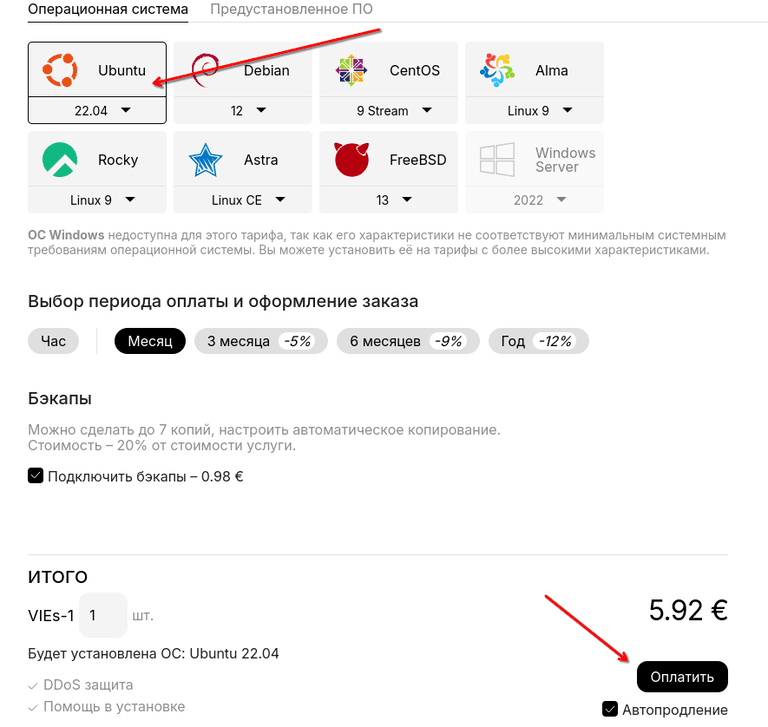
First, let's create a server on Ubuntu 22.04 OS to deploy Conduwuit on it. In our case, a VIEs-1 plan server in Vienna is used.
Preparing the server for Conduwuit installation
After activating your server, connect to it via SSH to install Conduwuit. For more details on how to connect to the server via SSH, see this article.
After connecting via SSH, we will update packages and install curl, as well as install Docker:
apt-get update && apt-get install curl sudo
curl -fsSL https://get.docker.com | sudo bash
After that, in a convenient directory for you on the server, create the conduwuit directory and go to it:
mkdir /conduwuit
cd /conduwuit
In this directory, we need to create two files docker-compose.yml and .env
First, let's create the docker-compose.yml file:
nano docker-compose.ymlThe following content must be copied to the file:
services:
  matrix:
    image: docker.io/girlbossceo/conduwuit:main
    restart: unless-stopped
    ports:
      - 127.0.0.1:8008:8008
    environment:
      CONDUWUIT_SERVER_NAME: "${SERVER_NAME}"
      CONDUWUIT_DATABASE_BACKEND: "rocksdb"
      CONDUWUIT_DATABASE_PATH: "/var/lib/conduwuit/"
      CONDUWUIT_PORT: "8008"
      CONDUWUIT_ADDRESS: "0.0.0.0"
      CONDUWUIT_ALLOW_REGISTRATION: "${ALLOW_REGISTRATION:-false}"
      CONDUWUIT_REGISTRATION_TOKEN: "${REGISTRATION_TOKEN:-}"
    volumes:
      - db:/var/lib/conduwuit/

volumes:
  db:
Then save the file and exit it.
To create the second file, we first need to generate REGISTRATION_TOKEN, we will do this with the command:
cat /dev/urandom | tr -dc 'a-zA-Z0-9' | fold -w 32 | head -n 1After executing the command, a generated string will be displayed in the console, which we will specify in the .env file:
In our case, the string was generated: ugcHxsLLrKUl27GNBnQvC1gZkuQ4kBNe

Next, let's create the .env file:
nano .envThe following content must be copied to the file:
SERVER_NAME=example.com
ALLOW_REGISTRATION=true
REGISTRATION_TOKEN=<random>
In the file, you need to replace the value of the SERVER_NAME field with your domain name that you will use for the Conduwuit server.
And in the REGISTRATION_TOKEN field, specify the string that we generated above, in our case: REGISTRATION_TOKEN=ugcHxsLLrKUl27GNBnQvC1gZkuQ4kBNe
Then save the .env file and close it.
Issuing SSL certificate for your domain and configuring proxy server
For the Conduwuit server to work, you need to issue an SSL certificate for your used domain. We will issue our own certificate using certbot.
First, you need to install certbot on the server:
apt-get install certbot -yAfter installation, we will issue a certificate for your domain with the command:
certbot certonly --rsa-key-size 2048 --standalone --agree-tos --no-eff-email --email email@customer -d matrix.your-domain.exampleBe sure to replace "email@customer" in the command with your email address, and also "your-domain.example" with the name of your domain for which you are issuing the certificate.
After successfully executing the command, you can view the files of the issued certificate with the command, where "your-domain.example" is the name of your domain:
ls -la /etc/letsencrypt/live/matrix.your-domain.example/Now you need to configure the proxy server, we will use Nginx for this. First, install it on the server:
apt-get install nginx -yThen create configuration files. Execute the command:
nano /etc/nginx/sites-available/conduwuitCopy the proxy configuration example to the file:
server {
    listen 80;
    server_name matrix.<domain>;
    return 301 https://$host$request_uri;
}

server {
    server_name matrix.<domain>;

    listen 443 ssl http2;
    listen [::]:443 ssl http2;

    access_log  /var/log/nginx/conduwuit.access.log;
    error_log   /var/log/nginx/conduwuit.error.log;

    ssl_certificate /etc/letsencrypt/live/matrix.<domain>/fullchain.pem;
    ssl_certificate_key /etc/letsencrypt/live/matrix.<domain>/privkey.pem;

    location /_matrix {
        proxy_pass http://localhost:8008;
        proxy_set_header X-Forwarded-For $remote_addr;
        # Nginx by default only allows file uploads up to 1M in size
        # Increase client_max_body_size to match max_upload_size defined in homeserver.yaml
        client_max_body_size 10M;
    }
}
Be sure to replace <domain> in the config with the name of your domain for which you issued the certificate.
After that, create a symbolic link:
ln -s /etc/nginx/sites-available/conduwuit /etc/nginx/sites-enabled/And check the Nginx configuration:
nginx -tIf the check did not pass successfully, check if you correctly created the configuration files according to the sample with your domain specified.
After successful config check, restart Nginx and enable autostart for it:
systemctl restart nginx
systemctl enable nginx
Starting Conduwuit
After completing server configuration, issuing SSL certificate and deploying the proxy server, we can start our docker container with Conduwuit.
To do this, it's enough to go to the conduwuit folder where you created two files (in our case, this is the /root/conduwuit/ directory, you can go to it with the command: cd /root/conduwuit/) and execute the command:
docker compose up -d
Check if the container appeared and its status:
docker compose up -d
Connecting to Conduwuit
You can use various clients suitable for communication in the Matrix ecosystem: https://matrix.org/ecosystem/clients/
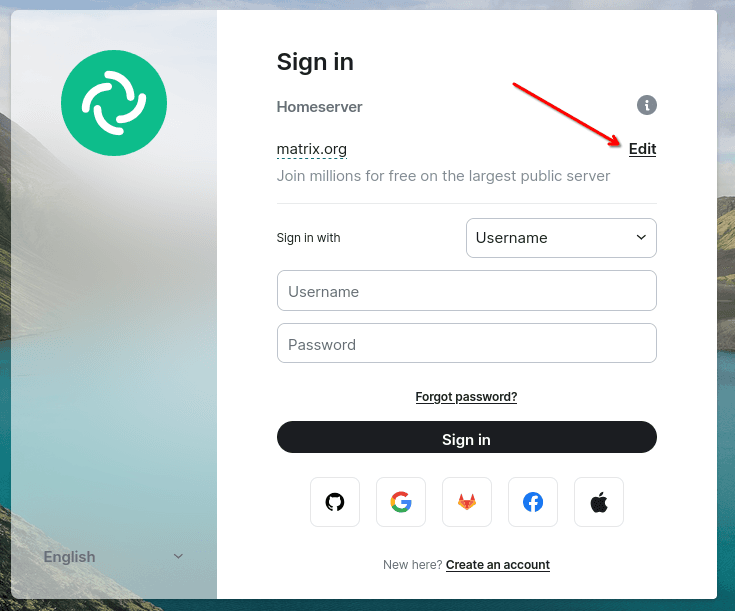
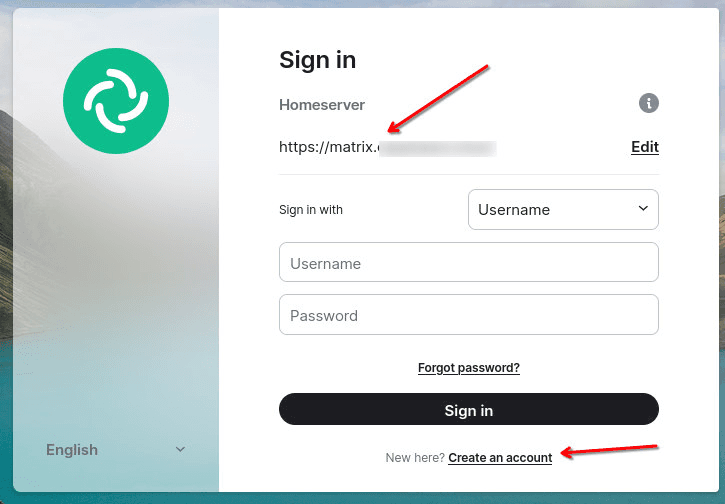
Including web clients that do not require installation of additional software, for example: https://app.element.io/#/login After going to the link, you need to change the server address to which the connection is made:
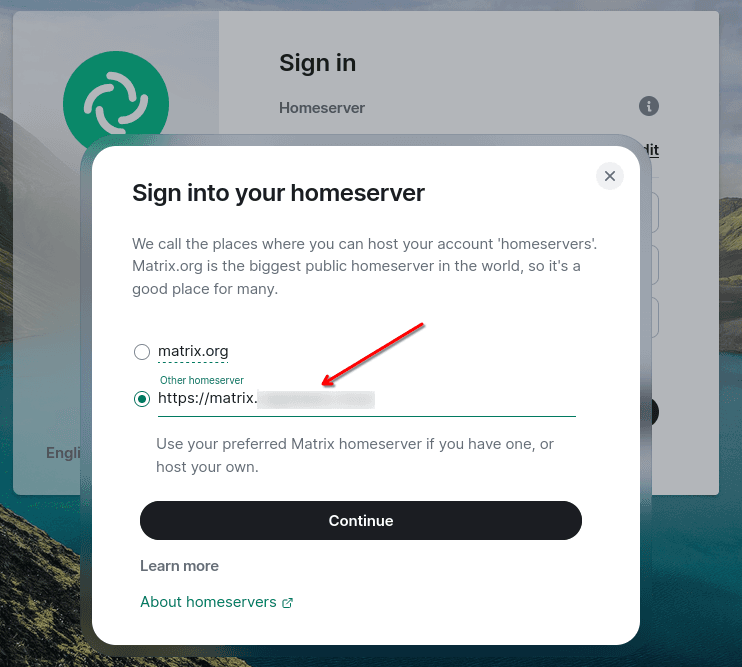
Then enter the address of your domain that you used to deploy your own Conduwuit server and confirm with the "Continue" button:
After that, you need to create an account on our server:
Then enter the data to create an account:
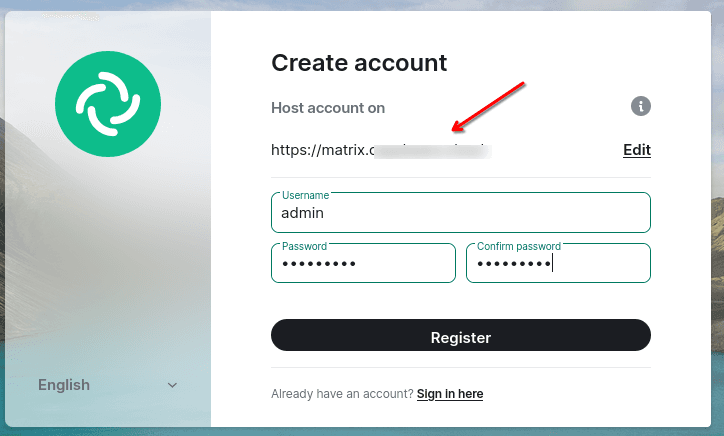
The first account created on the server is the Administrator.
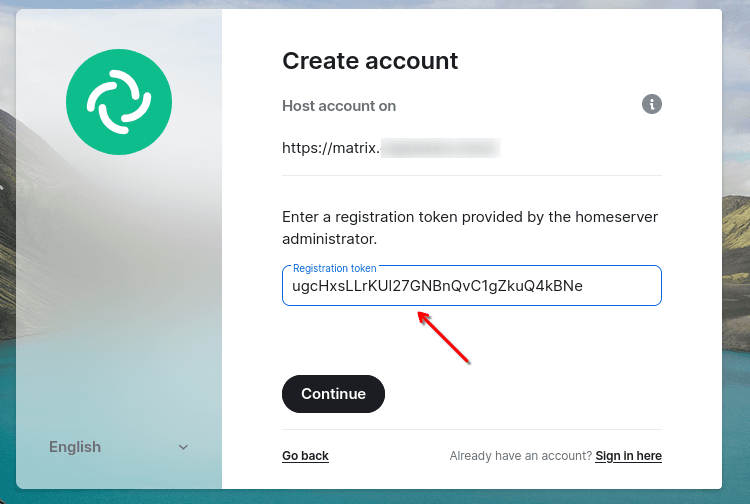
Then you will need to enter the registration token specified in the config:
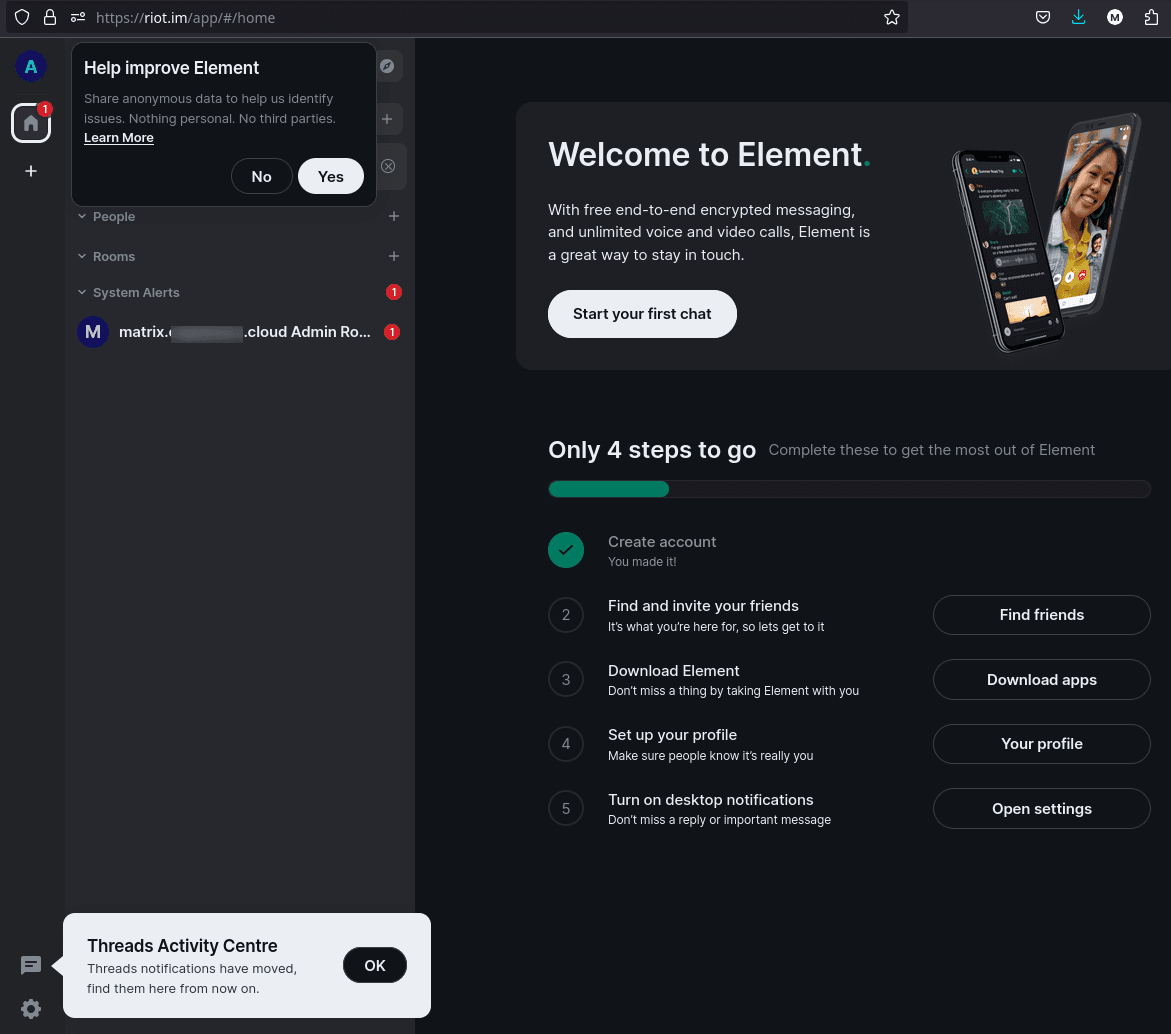
After that, you will see a welcome window with tips:
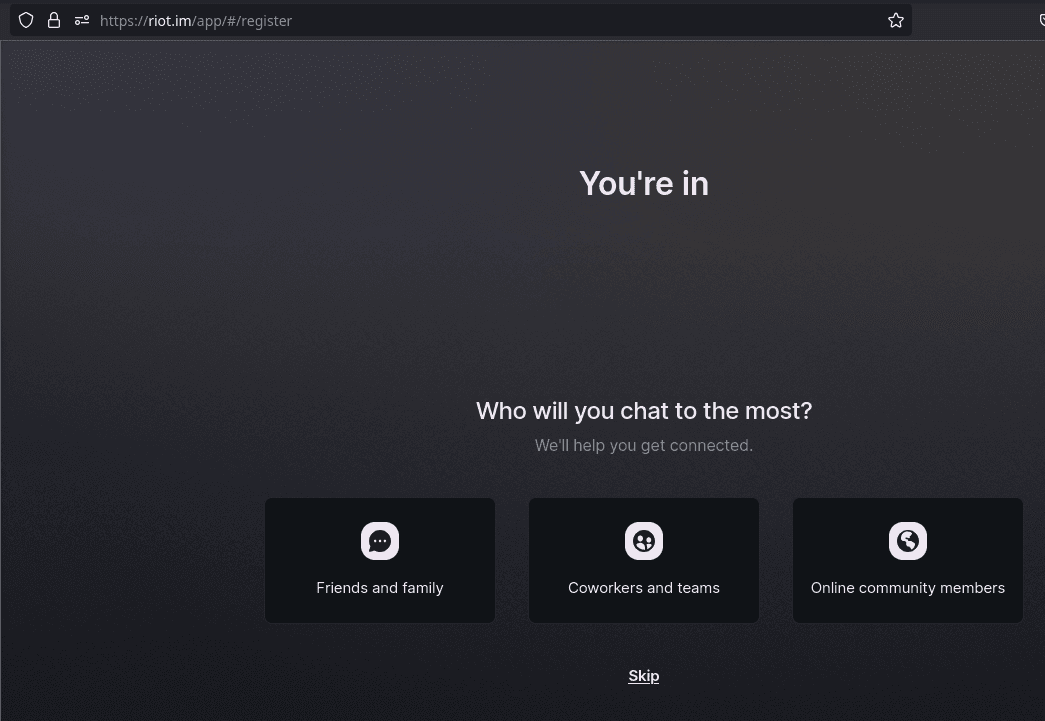
You can skip them with the "Skip" button and then you get to the main menu with dialogs and management:
Congratulations!
VPN service instructions
The "VPN" service allows you to provide secure and anonymous internet connection, as well as ensures high connection speed – up to 1 Gbps. In this instruction, we will tell you how to quickly and reliably deploy VPN on your computer or mobile device.
RDP connection
Connection to servers with Windows OS is carried out by default through RDP (Remote Desktop Protocol).