
Setting up VLESS in 3x-ui
3X-UI is a convenient panel for creating connection configs to proxies of various protocols such as VLESS, VMESS, Trojan, Shadowsocks. In this instruction, we will consider connection via VLESS protocol.
Creating a personal proxy in a few minutes
First, let's prepare a server with the installed 3x-ui package. This can be done in two different ways. You can choose the most suitable one for you.
Purchasing the necessary plan with pre-installed 3x-ui
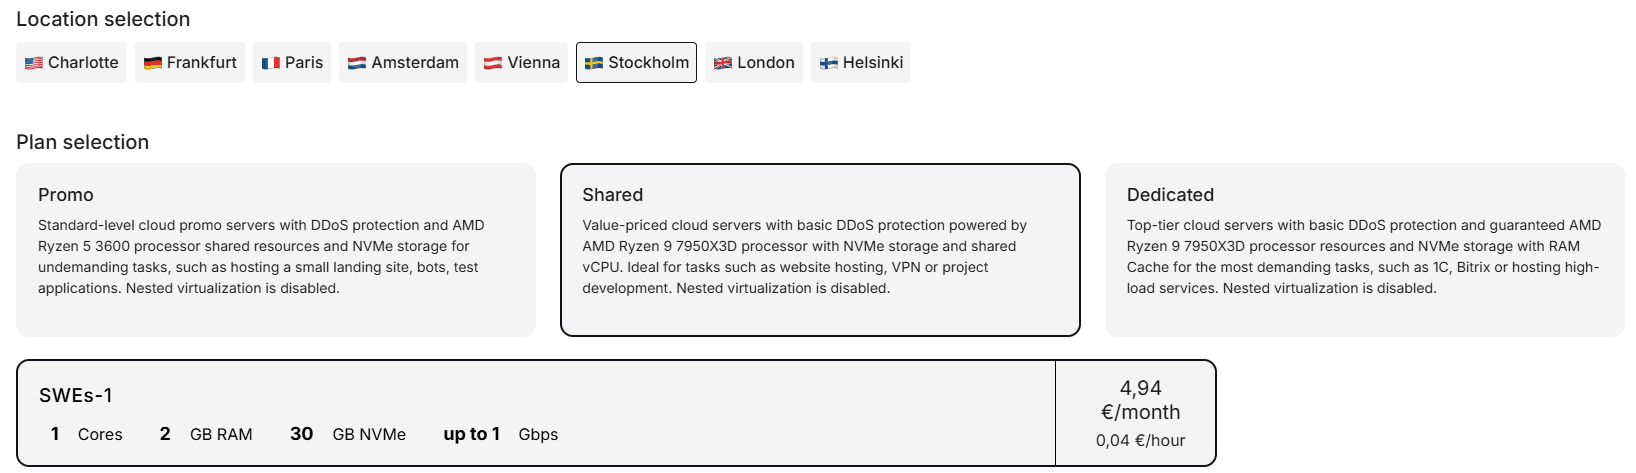
For this, we need to buy the necessary server in the desired location. In our case, it will be the basic plan SWEs-1 in Sweden
Go to the "Pre-installed Software" section

Specify the 3x-ui script we need
OS installation will be performed according to the OS specified in the pre-installed software script, in this case Ubuntu 22.04 + 3x-ui will be installed
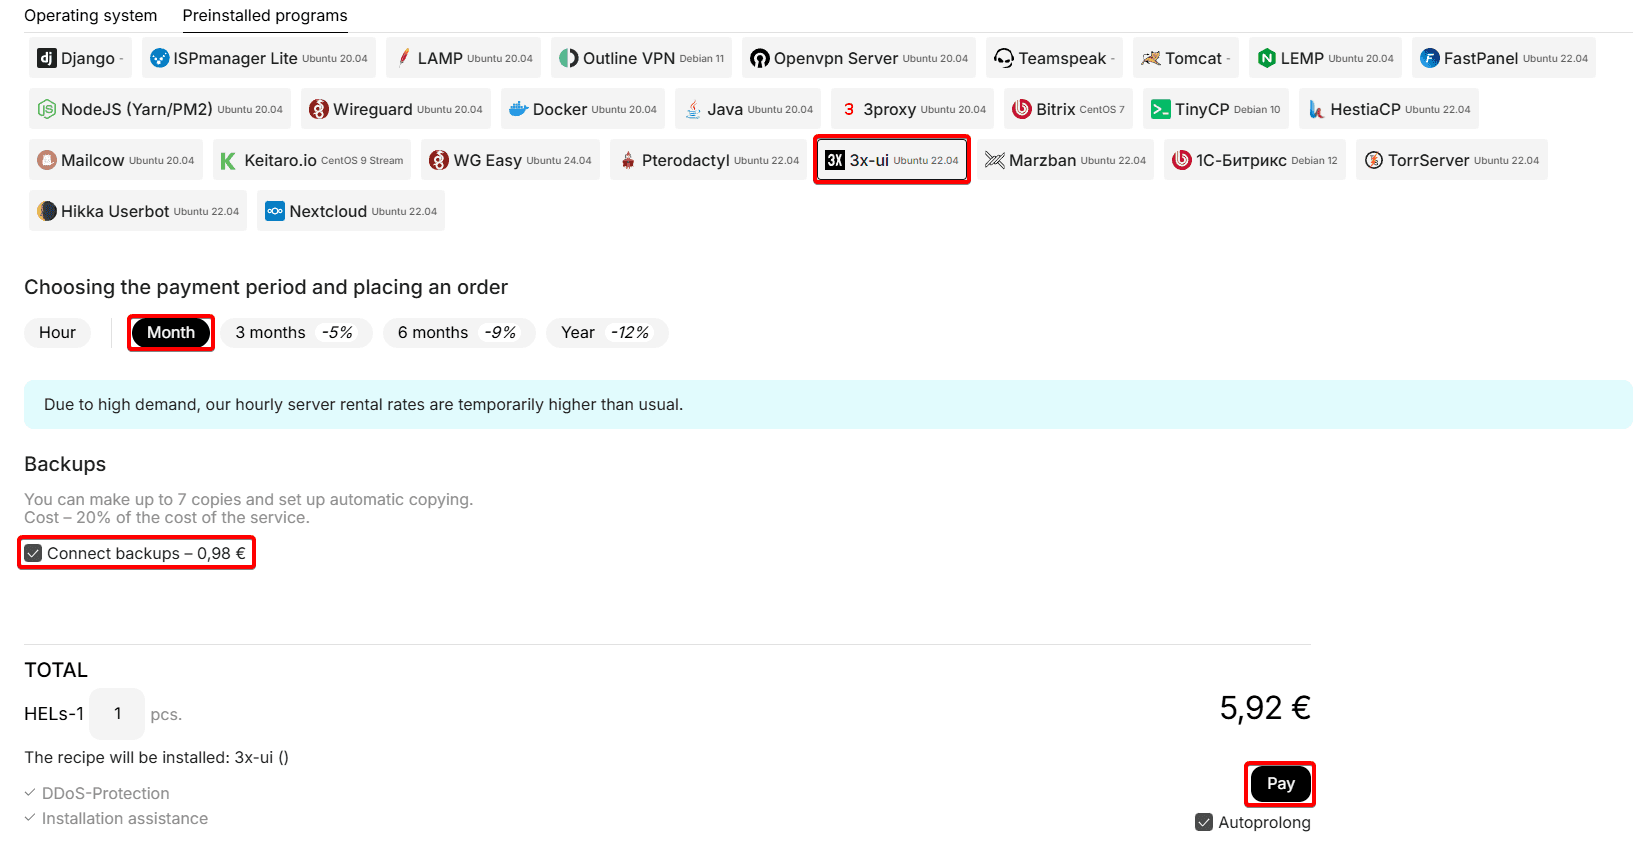
Set the desired rental period by hours or months, disable the "Backups" service if necessary and click the pay button
Now your server is ready to create a connection key. We will tell you about its creation in point 2 ("Accessing the 3x-ui panel and creating a user key")
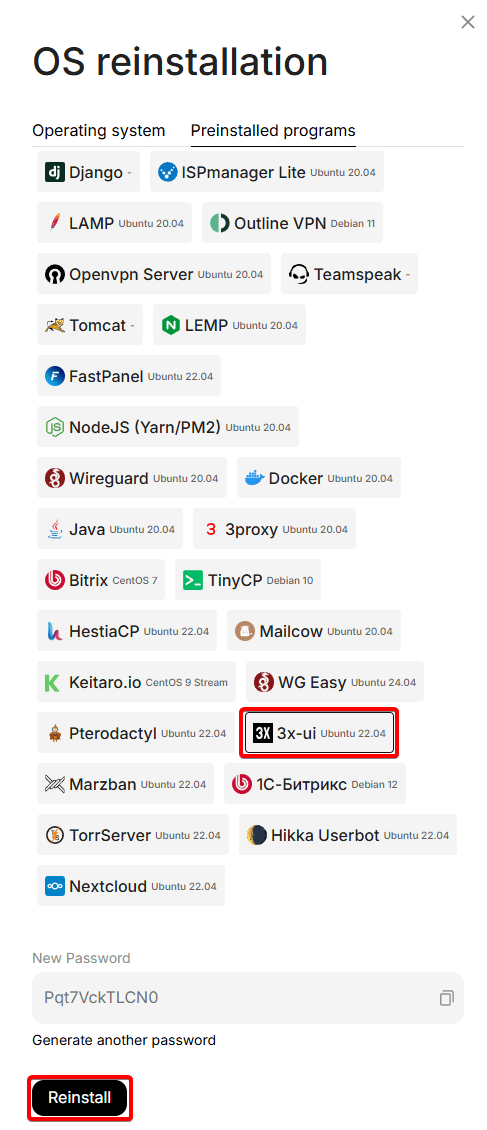
Reinstalling an existing server with 3x-ui script installation
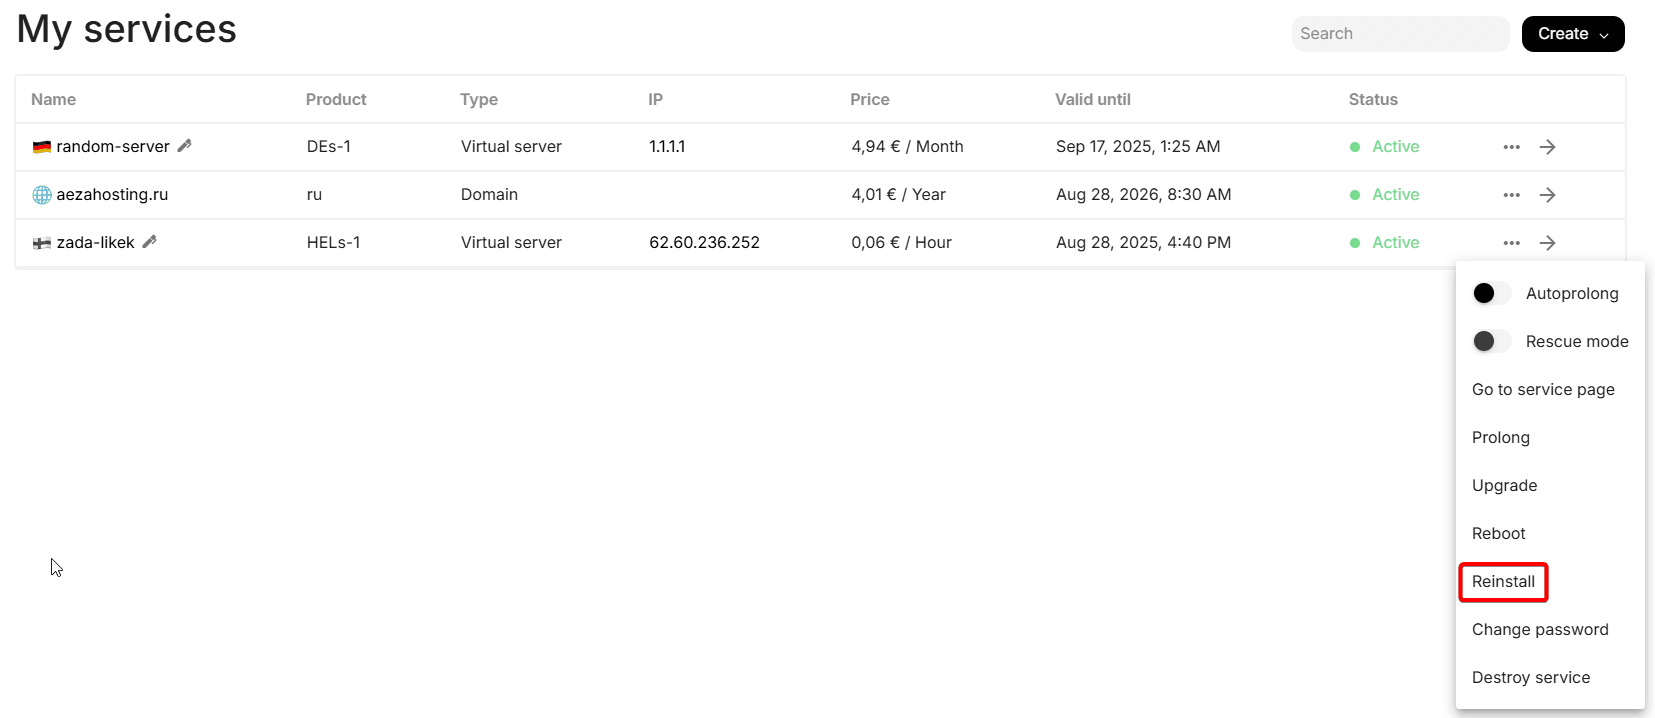
Go to the services section and click the three dots icon to the right of the already purchased server, select the reinstall option:
You will see this menu, in which we will go to the "Pre-installed Software" tab:
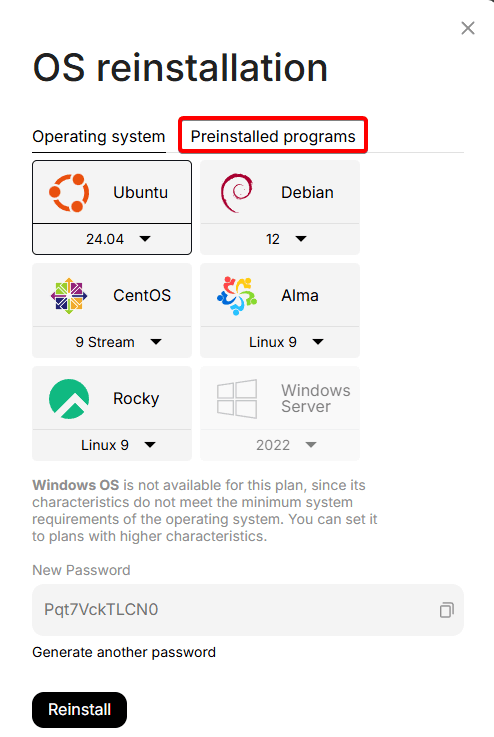
Select the 3x-ui script, click Reinstall:
Now your server will be reinstalled, after which it will be ready to create a connection config. We will tell you about its creation in point 2 ("Accessing the 3x-ui panel and creating a user key")
You can also contact support for help installing this software.
Setting VLESS 3x-ui
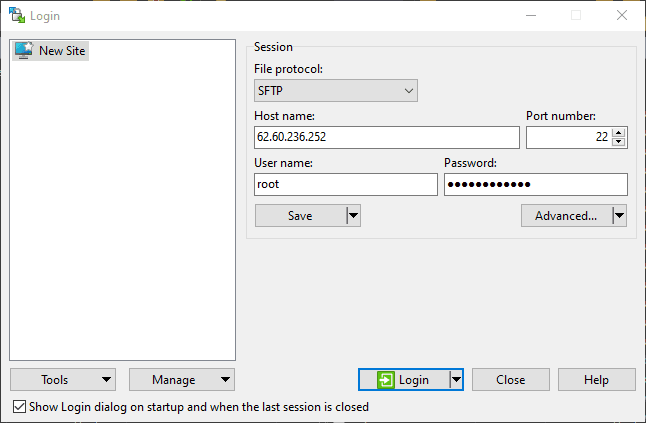
We connect to the server via WinSCP and login and password from the personal account.
Open the file in the root directory "3x-ui.txt " with data for connection to the 3x-ui control panel:

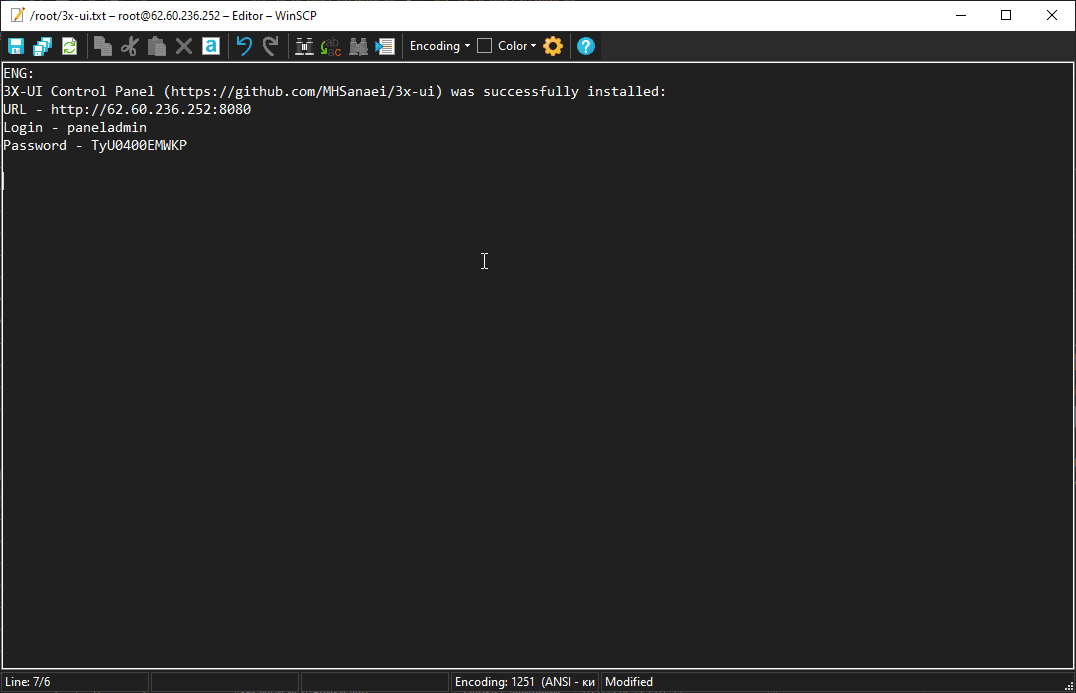
Copy the link and open it in your browser and get to the login page in the 3x-ui panel. We enter the data from the console and log in.

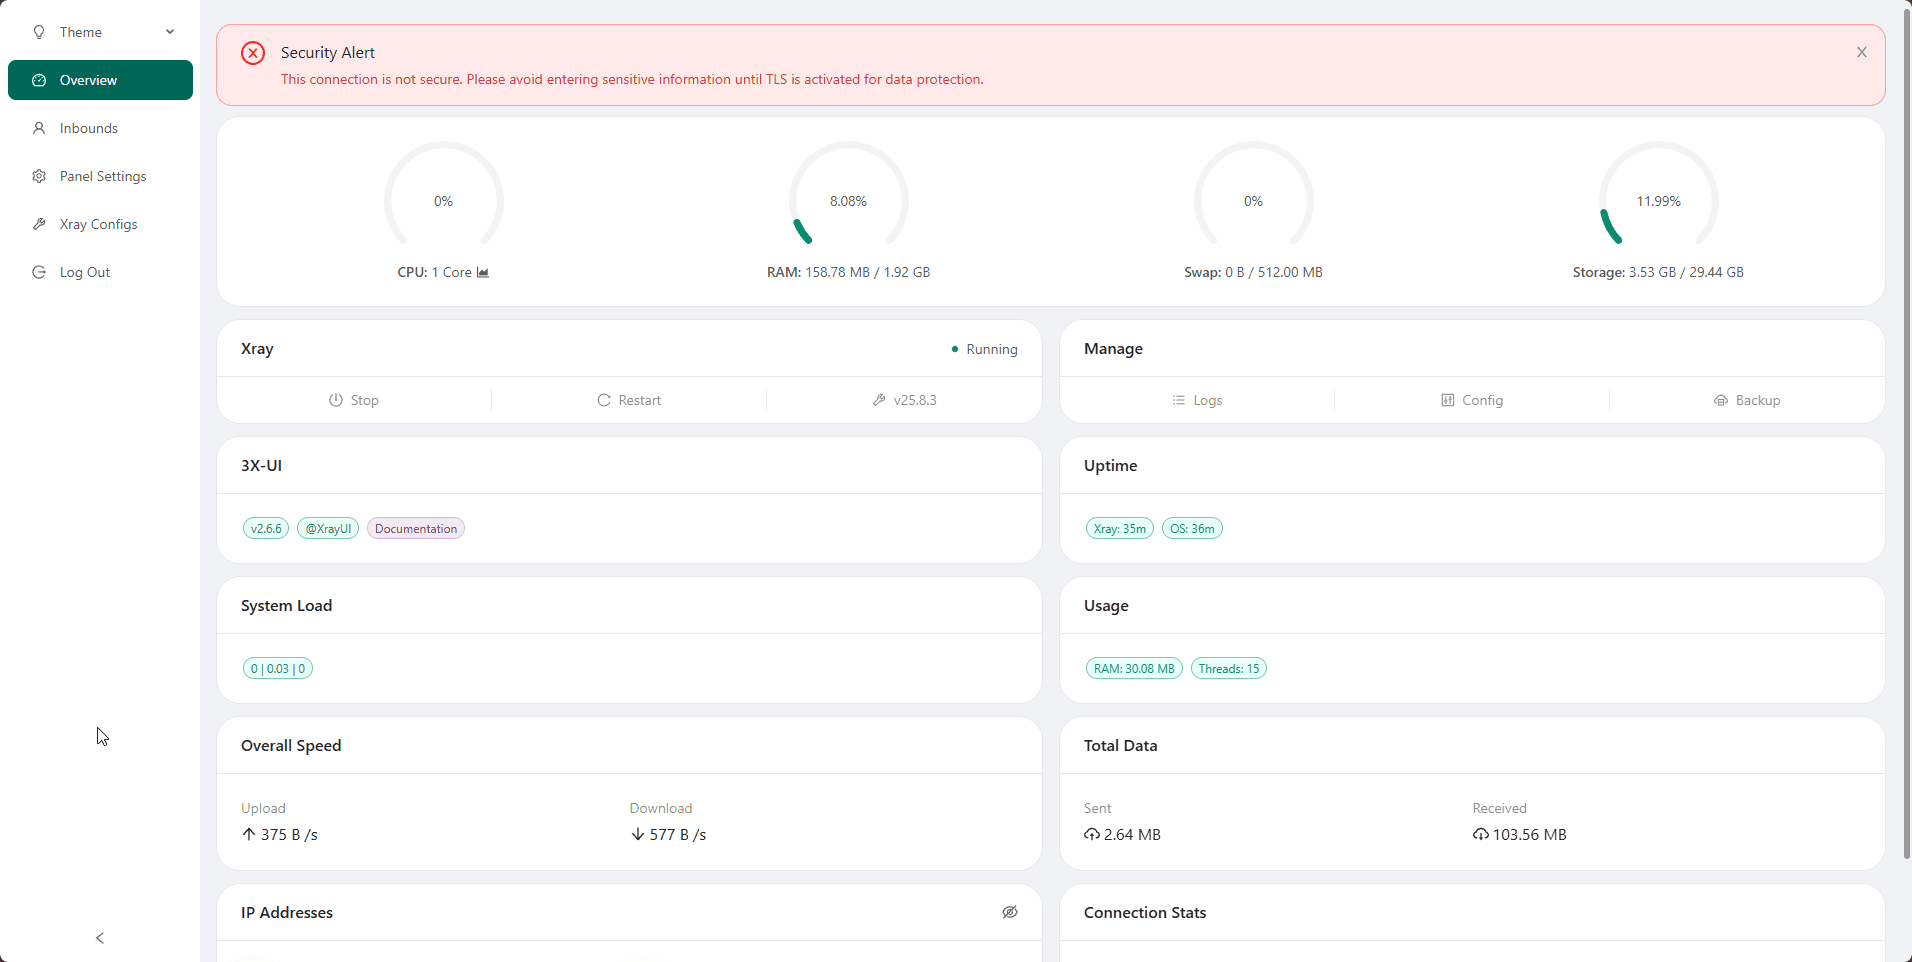
After logging in, we will see the main panel page:
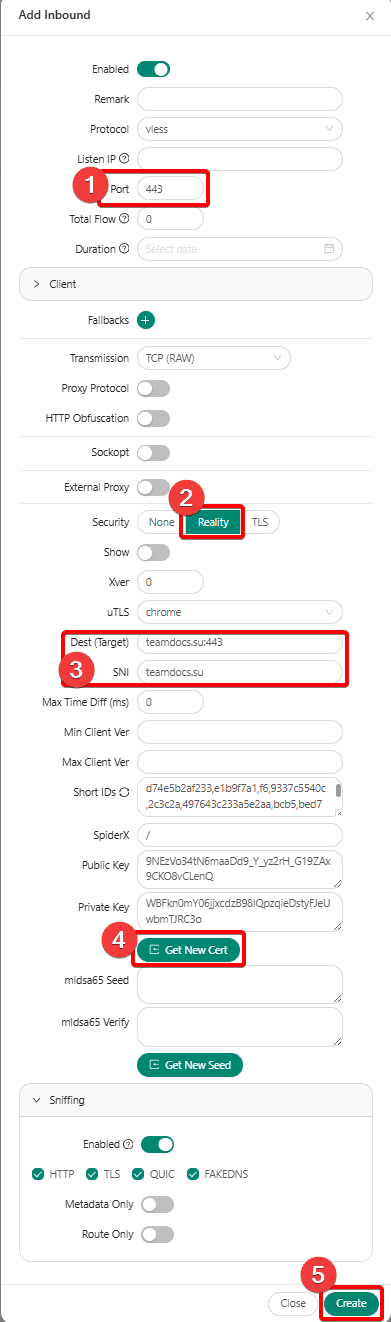
Go to the tab Inbounds, then click Add Inbound

Let's configure VLESS TCP Reality more correctly.
We recommend that you select the Server Name and Dest using the ping command The lower the ping to a specific site, the lower the latency when the connection is running. It is necessary to choose reliable sites, if the site is unavailable, there will be no connection. Be sure to choose non-popular but reliable sites as Server Name and Dest for your VLESS TCP Reality configuration.
Site requirements:
1. TLS 1.3
2. HTTP/2
3. Should not be behind a CDN service
You can check ping with the command:
ping site -c 4Better suited for servers in Sweden and Finland:
teamdocs.suBetter suited for servers in Germany:
wikiportal.suBetter suited for servers in Moscow:
docscenter.su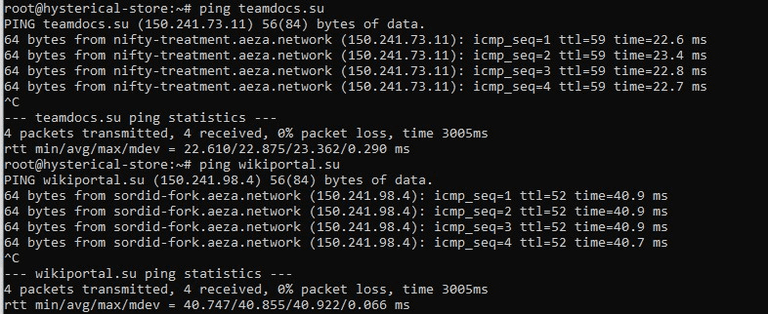 In this case, ping to the teamdocs.su site turned out to be the lowest, we will choose it as Server Name and Dest, specify them in these lines
It is necessary to set the port to 443, also click the "Get New Cert" button
After making changes, you need to click the "Create" button
Connection created, let's open the user list.
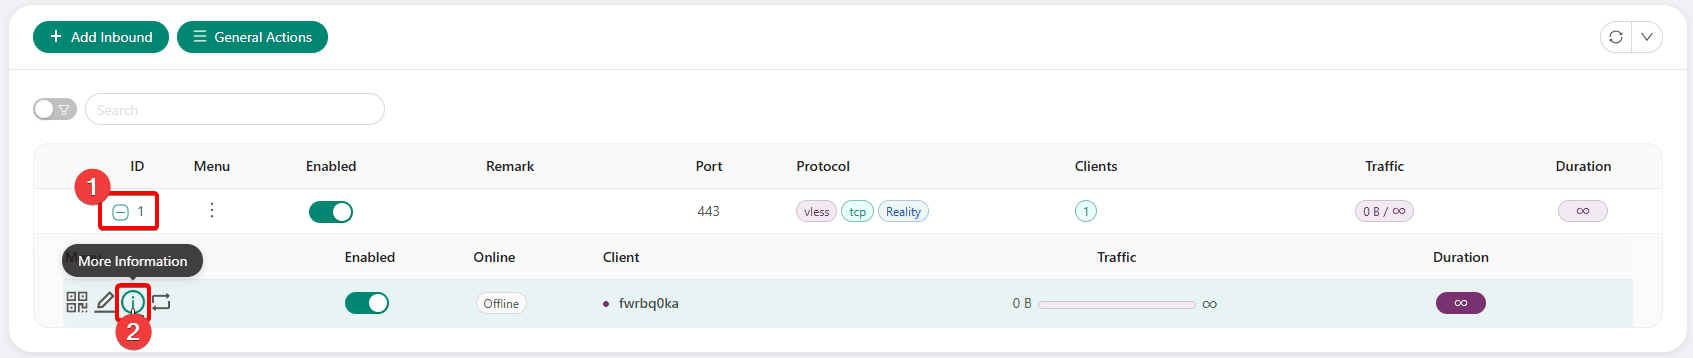
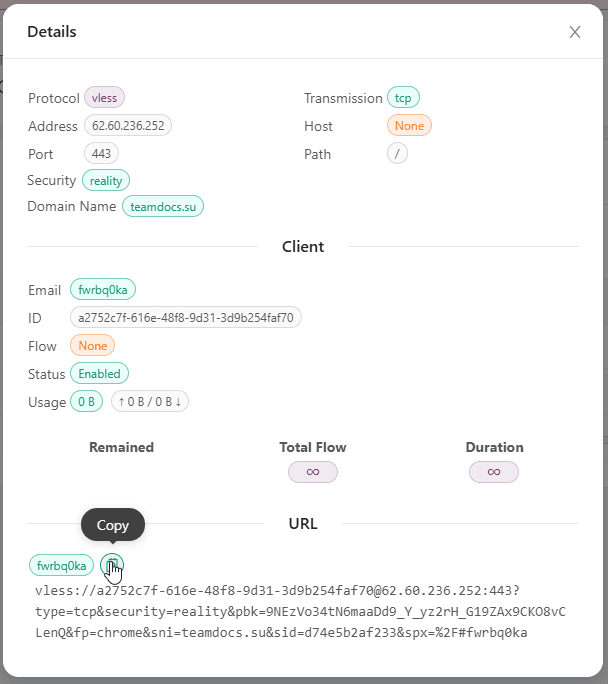
And from here you can already copy the VLESS key of the new client:
To create an additional user, you need to click on three dots and select the "Add user" menu
Select "Add user"
 Similarly, in the 3x-ui panel, it is possible to create profiles for other users and protocols.
Connecting the key in the VLESS client
You can learn about how to connect clients to your server in the following article: https://wiki.aeza.net/en/guides/setting-vless-clients/
How do I set up WARP proxying?
You can find instructions on how to do this here: https://wiki.aeza.net/en/guides/warp/
Network speed measurement [SpeedTest] on Windows OS
Here you can clearly learn how to measure network speed on VDS and Dedicated servers running Windows OS in the simplest and most effective way.
VPN service instructions
The "VPN" service allows you to provide secure and anonymous internet connection, as well as ensures high connection speed – up to 1 Gbps. In this instruction, we will tell you how to quickly and reliably deploy VPN on your computer or mobile device.